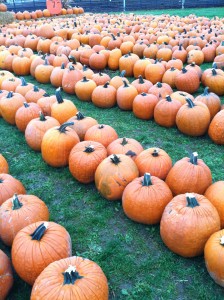
This week we’ll be having some fun with pumpkins! We’ll be reading , learning, singing all about them! So, grab your favorite little punkin, and let’s get started!
What We’re Reading:
The Legend of Spookley the Square Pumpkin
By: Joe Troiano
The Runaway Pumpkin
By: Kevin Lewis
Biggest Pumpkin Ever
By:Steven Kroll
From Seed to Pumpkin
Songs:
I’m a Little Pumpkin(Tune: I’m a Little Tea Pot)
I’m a little pumpkin, short and fat
I’m going to be a jack o lantern, how about that?
Just carve me out a mouth and nose and eyes
And light me up on Halloween night! The Rolly Polly Pumpkin
(tune: Itsy Bitsy Spider)
The rolly-polly pumpkin went rolling down the hill
Once he started rolling, he couldn’t stay still
He rolled and he rolled until he hit a rock
Then the rolly-polly pumpkin rolled to a stop. Five Little Pumpkins
(Finger-play, no tune)
Five little pumpkins sitting on a gate,
The 1st one said, “Oh my, it’s getting late.”
The 2nd one said, “There are witches in the air.”
The 3rd one said, “But we don’t care.”
The 4th one said, “Let’s run and run and run.”
The 5th one said, “I’m ready for some fun.”
Whewwwww went the wind & out went the lights,
And the five little pumpkins rolled out of sight.
Activities:
.:Macaroni Pumpkin:.
What You Need:
-
Short Tubular Pasta
-
Green Food Coloring
-
Orange Food Coloring OR Red & Yellow Food Coloring – to make orange
-
Rubbing Alcohol
-
Elmer’s White School Glue
-
Card stock – for background
-
2 Ziploc Bags
Coloring Pasta – Grown Ups ONLY!
1. Add a few drops of green food coloring and rubbing alcohol inside the Ziplock bag.
2. Add pasta to the bag and shake well to mix the color.
3. Place the wet pasta on a paper towel to air dry.
4. Repeat steps 1-3 for wheel shaped pasta using orange food coloring or red and yellow food coloring to make orange.
**Once your pasta is dry you are ready to make your pumpkin!
Directions:
-
Create a light sketch of a pumpkin with a pencil on the card stock. Big, little, squatty, thin or tall – get creative!
-
Use Elmer’s school glue to adhere the wheel pasta onto the card stock.
-
Finish up your pumpkins with a few pieces of thin tubular pasta as the green stem.
http://www.momto2poshlildivas.com/2011/10/colored-glittered-pasta-pumpkins-for.html
.:“What’s Inside a Pumpkin” Craft:.
The”What’s Inside a Pumpkin” craft is a classic preschool fall craft that turns out cute every time. Orange yarn acts as the pumpkin “guts”, real pumpkin seeds are the seeds and they are glued inside a pumpkin cut out.
What You Need:
- Orange, green, and brown construction paper
- Scissors
- Glue
- Stapler
- Orange yarn
- Pumpkin seeds
- Pumpkin template
- Black marker
Directions:
- Print out the pumpkin template and cut the pieces out. Trace it onto orange construction paper.
![pumpkin-insides-craft[1]](https://greatlakesbayparents.com/wp-content/uploads/2012/10/pumpkin-insides-craft1.jpg) You need two pumpkin cut-outs for this craft, one for the front and one for the back.
You need two pumpkin cut-outs for this craft, one for the front and one for the back. - Cut a stem out of brown paper and a leaf out of green paper.
- Cut small pieces of orange yarn.
- Spread a layer of glue in the middle of one of the pumpkins. Put on the cut-up yarn and the pumpkin seeds. Set aside to dry.
- Staple the other pumpkin on top of the embellished pumpkin to “hide” the seeds and guts.
- Add the finishing touches with a leaf and the stem.
- Write “what’s inside a pumpkin” on the front of the pumpkin with a marker.
http://www.allkidsnetwork.com/crafts/fall/inside-pumpkin-craft.asp
.:Pumpkin Bracelet:.
What You Need:
- green chenille stems (pipe cleaners)
- orange beads
Directions:
- Fold the pipe cleaner in half and twist the top to create a loop — this will be your stem.
- Fill both legs with beads, leaving a small piece of chenille stem empty at both ends.
- Twist the ends together and tuck inside the beads.
- Shape your pumpkin into a tall and skinny or short and plump shape!
![143552306843110812_B7UgFJFD_c[1]](https://greatlakesbayparents.com/wp-content/uploads/2012/10/143552306843110812_B7UgFJFD_c1-300x150.jpg)
http://blissfullydomestic.com/fun-bliss/crafts-fun-bliss/simple-beaded-pumpkin/12902/
Snack:
.:Pumpkin Oreo Cookies:.
![276408495851046560_AYDNzKY4_b[1]](https://greatlakesbayparents.com/wp-content/uploads/2012/10/276408495851046560_AYDNzKY4_b1.jpg) What You Need:
What You Need:
- Oreo Cookies
- Wilton Orange Candy Melts
- Green icing
- Pretzel sticks
Directions:
- Melt the Wilton candy melts according to the directions on the bag.
- Dip the Oreos in the orange chocolate to completley coat the cookie. ***Forks and chop sticks work great to lower and raise the Oreo out of the chocolate.
- Allow the chocolate to dry on wax paper.
- Embellish the pumpkin with green leaves made out of icing and a broken pretzel stick for the stem.
- Enjoy!
http://charmedlifediva.blogspot.com/2012/09/its-pumpkin-time.html
Videos:
.:Five Little Pumpkins:.
.:SUPER WHY! | Alpha Pigs Pumpkin Game:.
Pumpkin Farms In The Great Lakes Bay Regions:
Grandma’s Pumpkin Patch
4277 North Eastman Road Midland, MI 48642(989) 513-5222 Johnson’s Giant Pumpkins 4715 N. Portsmouth Rd., Saginaw MI, 48601 LeCronier’s Baby Acres 5805 S. Flajole Rd., Freeland, MI 48623 (989) 496-3633 Warmbier Farms 5300 Garfield Road, Auburn, MI 48611
(989) 662-7002 OR (989) 662-7003 Papas Pumpkin Patch 3909 S. Summerton Rd., Mount Pleasant, MI 48858 (989) 773-7750 The Wild Pumpkin Inc 5799 Beaverton Rd., Beaverton, MI 48612 (989) 435-9001 The Pumpkin Farm 4150 Bernthal Rd., Standish, MI 48658 (989) 846-2251 Berry Patch 2070 Tittabawassee Rd., Hemlock, MI 48626 (989) 642-8403

![40816293[1]](https://greatlakesbayparents.com/wp-content/uploads/2012/10/408162931.jpg)
![29458829[1]](https://greatlakesbayparents.com/wp-content/uploads/2012/10/294588291.jpg)
![100047319[1]](https://greatlakesbayparents.com/wp-content/uploads/2012/10/1000473191.jpg)
![14883571[1]](https://greatlakesbayparents.com/wp-content/uploads/2012/10/148835711.jpg)
![P1130950[2]](https://greatlakesbayparents.com/wp-content/uploads/2012/10/P11309502-242x300.jpg)
![429300_10151207265260403_281288171_n[1]](https://greatlakesbayparents.com/wp-content/uploads/2012/10/429300_10151207265260403_281288171_n1-300x225.jpg)