Hillary, a.k.a The Lesson Planning Mommy, is one of the founders of Great Lakes Bay Moms Members. Hillary has a bachelor’s degree in Early Childhood Education pre-school through third grade and a Master degree in Elementary Education grades K-8 with a reading endorsement K-12 grade. She loves creating meaningful, mind provoking activities and lessons for kids.
The Lesson Planning Mommy – Snow!!!
What We’re Reading:
![9780142412428_p0_v1_s114x166[1]](https://greatlakesbayparents.com/wp-content/uploads/2013/01/9780142412428_p0_v1_s114x1661.jpg) Snow Globe Family
By: Jane O’Connor |
![9780823425457_p0_v1_s114x166[1]](https://greatlakesbayparents.com/wp-content/uploads/2013/01/9780823425457_p0_v1_s114x1661.jpg) It’s Snowing!
By: Gail Gibbons |
![9780399235795_p0_v2_s114x166[1]](https://greatlakesbayparents.com/wp-content/uploads/2013/01/9780399235795_p0_v2_s114x1661.jpg) Dream Snow
By: Eric Carle |
Top
Songs:
The Winter Song (tune: Farmer in the Dell)
Let’s sing a winter song,
Let’s sing a winter song,
The days are short, the nights are long.
Let’s sing a winter song.
The winter wind is cold,
The winter wind is cold,
It freezes noses, ears, and toes.
The winter wind is cold.
Winter now is here,
Winter now is here,
Put on your coat, your hat, your gloves, Winter now is here.
Winter Wonderland (To the tune of Ring Around the Rosie)
Winter Winter Wonderland
Pockets Full of Mittens
Snowflakes, Snowflakes
We All Fall Down!
The Winter Hokey-Pokey (To the tune of The Hokey-Pokey)
You put your right mitten in,
You take your right mitten out.
You put your right mitten in,
And you shake it all about.
You do the winter pokey, [shiver]
And you turn yourself around.
That’s what it’s all about!
Others Include:
You put your left mitten in….
You put your right boot….
You put your left boot….
You put your winter hat in….
You put your snowsuit (whole body) in….
Top
Activities:
![53409945552494318_p1kri4SJ_b[1]](https://greatlakesbayparents.com/wp-content/uploads/2013/01/53409945552494318_p1kri4SJ_b11.jpg)
|
What You Need:
- Two 16 oz boxes of corn starch/ corn flour (or one 32 oz box)
- One can of shaving cream (any variety will do- unscented is best!
- Peppermint Extract (optional)
- Buffalo Snow Iridescent Flakes ( The Dollar Tree and Walmart– you know, that fake snow glitter )
Directions:
- Slowly add the shaving cream and snow glitter to the corn starch. You don’t need the whole bag of snow glitter. Just keep adding it until you like the amount of sparkle. It takes a bit of mixing to work the shaving cream into the corn starch but the process is FUN! Both materials feel amazing!
- Add a couple drops of peppermint extract towards the end of the mixing process but you can add it at anytime or skip it. It isn’t necessary; It just adds another fun element of play and exploration.
- How will you know you have the right consistency? The consistency should be AMAZING- fluffy- like clouds in your hands- not gunky or sticky at all but powdery- and mold-able. It will be softer than any other powdery sensory material! This stuff seriously feels like fluffy clouds in your hands (or what I would imagine them to feel like) It is SO SOFT! It holds it’s mold better than any of the other homemade snow or sensory materials we have tried, making it the perfect Homemade snow material!!! It is fabulous for making snowballs, snowmen, and even for having a snowball fight
Frosty fluff can be stored in a covered sensory bin or similar container and used for about two weeks! |
![197595502372782343_aXblALLu_b[1]](https://greatlakesbayparents.com/wp-content/uploads/2013/01/197595502372782343_aXblALLu_b1.jpg) |
We’re cutting the bottoms of our paper tubes into strips to create a few snowflake-shaped stamps.What You Need:
- paper tube
- scissors
- paper
- paint
- plate
Directions:
- With your scissors, cut strips into your paper tube as wide and long as you like. Child-friendly scissors work great if your kids want to make the cuts themselves. And you can make them into any shape. We did long rectangle strips and triangle strips. My daughter did squiggles for each cut. Anything goes!
- Add a squirt of paint to your plate and dip your cut paper tube into the paint. You may have to use your fingers a bit on this to help get the paint onto each strip.
- Press your painted tube onto your paper and press. Again, you might have to use your fingers on each strip to press it down for the best results. Be prepared for a little mess.
- We also added in some snowmen as well with circle paper tube stamps.
- You can change up your color of paint, adding in other shades of blue or white to fit your winter mood.
|
|
![29062360064940896_UHs3N0t9_b[1]](https://greatlakesbayparents.com/wp-content/uploads/2013/01/29062360064940896_UHs3N0t9_b1.jpg)
|
What You Need:
- shaving cream
- Elmer’s school glue
- blue card stock
- paper & fabric scraps
- scissors
Directions:
- Mix equal parts of shaving cream and Elmer’s glue. The mixture dries puffy just like this.
- Use your fingers to spread the shaving cream mixture and create your snowmen on blue card-stock.
- Add construction paper or fabric scraps to form the eyes, nose, mouth, hat, and arms. (I used ribbon for the scarf.)
|
Top
Snack:
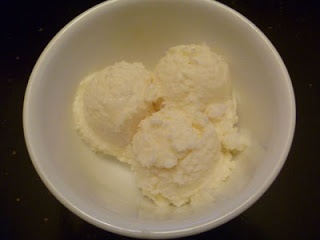
![135952482472941459_z5Jyr6IG_c[1]](https://greatlakesbayparents.com/wp-content/uploads/2013/01/135952482472941459_z5Jyr6IG_c1.jpg) |
What You Need:
8 C clean snow
1 can sweetened condensed milk
1 tsp vanilla
Directions:
- Mix it all together & serve!
***I have frozen it before when we have not eaten all of it. It keeps, but it freezes harder than store-bought ice cream.
|
Top
For more LESSON PLANNING MOMMY click HERE.

![197595502372782343_aXblALLu_b[1]](https://greatlakesbayparents.com/wp-content/uploads/2013/01/197595502372782343_aXblALLu_b1.jpg)
![135952482472941459_z5Jyr6IG_c[1]](https://greatlakesbayparents.com/wp-content/uploads/2013/01/135952482472941459_z5Jyr6IG_c1.jpg)

![9780142412428_p0_v1_s114x166[1]](https://greatlakesbayparents.com/wp-content/uploads/2013/01/9780142412428_p0_v1_s114x1661.jpg)
![9780823425457_p0_v1_s114x166[1]](https://greatlakesbayparents.com/wp-content/uploads/2013/01/9780823425457_p0_v1_s114x1661.jpg)
![9780399235795_p0_v2_s114x166[1]](https://greatlakesbayparents.com/wp-content/uploads/2013/01/9780399235795_p0_v2_s114x1661.jpg)
![53409945552494318_p1kri4SJ_b[1]](https://greatlakesbayparents.com/wp-content/uploads/2013/01/53409945552494318_p1kri4SJ_b11.jpg)
![29062360064940896_UHs3N0t9_b[1]](https://greatlakesbayparents.com/wp-content/uploads/2013/01/29062360064940896_UHs3N0t9_b1.jpg)