The Lesson Planning Mommy – Happy Thanksgiving!
Are you looking for some fun activities to do with the kiddos? Boy do I have a fun three days planned for you! Check out these fun Thanksgiving books, songs, activities and even a gift for Grandma!
What We’re Reading:
|
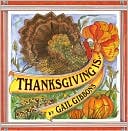
Thanksgiving Is…
By: Gail Gibbons |
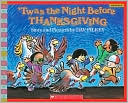
‘Twas the Night before Thanksgiving
By: Dav Pilke |
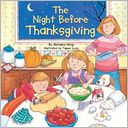
The Night Before Thanksgiving
By: Natasha Wing |
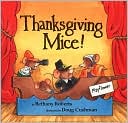
Thanksgiving Mice!
By: Bethany Roberts |
Songs:
“Turkey Pokey ” (Tune: Hokey Pokey)
You put your right wing in. You put your right wing out.
You put your right wing in,
And you shake it all about.
You do the turkey pokey And you turn yourself around.
That’s what it’s all about.
Additional verses: Left wing, Drumsticks, Stuffing, Wattle (Head), Tail Feathers (Bottom), Turkey body.
“Thanksgiving Song” (Tune: Twinkle, Twinkle)
Let’s be thankful for this day
For our friends and for our play
Let’s be thankful; let’s be glad
For the food and things we have
Let’s give thanks for you and me
And our home and family.
Activities:
.:Pilgram Girl and Boy Hats:.
Pilgrim Girl’s Hat
![286119382547189364_EICO6UlV_c[1]](https://greatlakesbayparents.com/wp-content/uploads/2012/11/286119382547189364_EICO6UlV_c1.jpg) What You Need: What You Need:
12 x 18″ piece of white construction paper, cloth or felt (or tape 2 pieces of standard white paper together).
Tape
String or yarn
- Fold up 2″ along one lengthwise edge of the paper. On the opposite lengthwise edge, measure and mark the 6″ and 12″ spot with a small mark.
- Cut 5″ vertical slits at the marked spots, creating 3 “flaps”.
- Take the outer two flaps and bring together.
- Pull the center flap over and staple it all together to shape the hat.
- Attach yarn to tie hat under the chin.
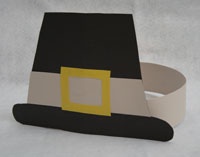
Boy’s Pilgrim Hat
![40391727879212973_KWRTk0g7_c[1]](https://greatlakesbayparents.com/wp-content/uploads/2012/11/40391727879212973_KWRTk0g7_c1.jpg) What you need: What you need:
White poster board or light-weight cardboard
Construction paper: Black, yellow, gray
Scissors
Tape
Glue
- Cut a headband out of poster board that is slightly larger than your child’s head.
- Cut a hat shape out of black construction paper.
- Cut a strip 1 1/2″ wide out of gray construction paper and glue to the hat as shown. Trim the edges off to match the angle of the hat.
- Cut a square out of yellow construction paper that is 2 1/2″ X 2 1/2″ inches.
- Cut the center out of the square and discard. Glue the remainder of the square over the gray strip.
- Glue or tape the finished hat to the headband.
- Tape the headband to fit around the child’s head and trim off any excess poster board.
![124763852146530846_tFMVKOXz_c[1]](https://greatlakesbayparents.com/wp-content/uploads/2012/11/124763852146530846_tFMVKOXz_c1.jpg)
What You Need:
1 cup flour
1/2 cup salt
1 cup water
2 tbsp oil
2 tbsp cream of tartar
1/3 of the jar of pumpkin pie spice (the tiny jar)
maple extract
vanilla extract
red and yellow food coloringCombine the dry ingredients and the oil.
- Slowly add the water.
- Add a few drops of each of the extracts and a few drops of red and yellow food coloring.
- Cook over medium heat, stirring until stiff.
- As it mixes you can see if you’ll need more food dye.
- Once it’s finished cooking, turn out onto wax paper and allow to cool.
- Does it smell too spicy? Add a little bit more extract and knead it all together.
- If the dough is too sticky, add a little more flour.
- If it’s too dry, add a few drops of water.
Gift:
What You Need:
Fabric Paint (Brown, Green, Red, Yellow, Orange, Black)
Two New White Potholders
Tiny Little Hands  Directions:
-
Smear Brown Paint on the palm and thumb.
-
Dab the colored paint on each finger.
-
Lay the hand on the center of the potholder and gently press each finger down.
-
Lift the hand straight up.
-
Using the black fabric paint draw legs and an eye.
-
Then use the orange to make a beak and red to make the waddle piece
-
Use paint to write their name or anything else you want to say.
Snack:
Snack Mix
![179862578837906247_cKQzWxbE_b[1]](https://greatlakesbayparents.com/wp-content/uploads/2012/11/179862578837906247_cKQzWxbE_b1.jpg)
What You Need:
Runts
Bugles
treat bags
a stapler
scissors
some double sided tape.
- Fill the bags with a handful of both Bugles and Runts, fold over the bag and staple closed.
- Then print the Cornucopia Printable.
- Attach the printable with double sided tape.
I hope you have a very special and memorable Thanksgiving this year! The hubs, boys and I are looking forward to spending four wonderful days with our family – it can’t come soon enough! Happy Thanksgiving! Gobble, Gobble! -Hillary |


![286119382547189364_EICO6UlV_c[1]](https://greatlakesbayparents.com/wp-content/uploads/2012/11/286119382547189364_EICO6UlV_c1.jpg) What You Need:
What You Need:![40391727879212973_KWRTk0g7_c[1]](https://greatlakesbayparents.com/wp-content/uploads/2012/11/40391727879212973_KWRTk0g7_c1.jpg) What you need:
What you need:![124763852146530846_tFMVKOXz_c[1]](https://greatlakesbayparents.com/wp-content/uploads/2012/11/124763852146530846_tFMVKOXz_c1.jpg)
![270004940129327119_lSONQfIw_b[1]](https://greatlakesbayparents.com/wp-content/uploads/2012/11/270004940129327119_lSONQfIw_b1.jpg)

![179862578837906247_cKQzWxbE_b[1]](https://greatlakesbayparents.com/wp-content/uploads/2012/11/179862578837906247_cKQzWxbE_b1.jpg)